
15.04.2024 - Anleitung funktioniert auch für OpenWrt x64 23.05.3 unter Proxmox 8
21.01.2022 - Anleitung aktualisiert (OpenWrt x64 21.02.1, Proxmox 7)
07.11.2020 - Anleitung aktualisiert
18.07.2020 - Anleitung aktualisiert
Neue VM ohne Festplatte erstellen. (oder diese nach dem erstellen einfach wieder löschen)
Auf dem Proxmox Host lade ich das aktuelle x64 generic OpenWrt Image herunter, entpacke es und importiere das Festplattenimage in die VM.
(Nur mit dem combined.img.gz ist es später möglich die Partition zu vergrößern und den gesamten Speicherplatz zu nutzen!)
OpenWrt 23.05.3 x64
# Archiv herunterladen und entpacken
root@pmx02:~# wget https://downloads.openwrt.org/releases/23.05.3/targets/x86/64/openwrt-23.05.3-x86-64-generic-ext4-combined.img.gz
root@pmx02:~# gunzip openwrt-23.05.3-x86-64-generic-ext4-combined.img.gz

# Disk importieren (VM ID anpassen!)
root@pmx02:~# qm importdisk 405 openwrt-23.05.3-x86-64-ext4-combined.img local-lvm
importing disk 'openwrt-23.05.3-x86-64-ext4-combined.img' to VM 405 ...
OpenWrt 21.02.1 x64
# Archiv herunterladen und entpacken
root@pmx02:~# wget https://downloads.openwrt.org/releases/21.02.1/targets/x86/64/openwrt-21.02.1-x86-64-generic-ext4-combined.img.gz
root@pmx02:~# gunzip openwrt-21.02.1-x86-64-generic-ext4-combined.img.gz

# Disk importieren (VM ID anpassen!)
root@pmx02:~# qm importdisk 405 openwrt-21.02.1-x86-64-generic-ext4-combined.img local-lvm
importing disk 'openwrt-21.02.1-x86-64-generic-ext4-combined.img' to VM 405 ...
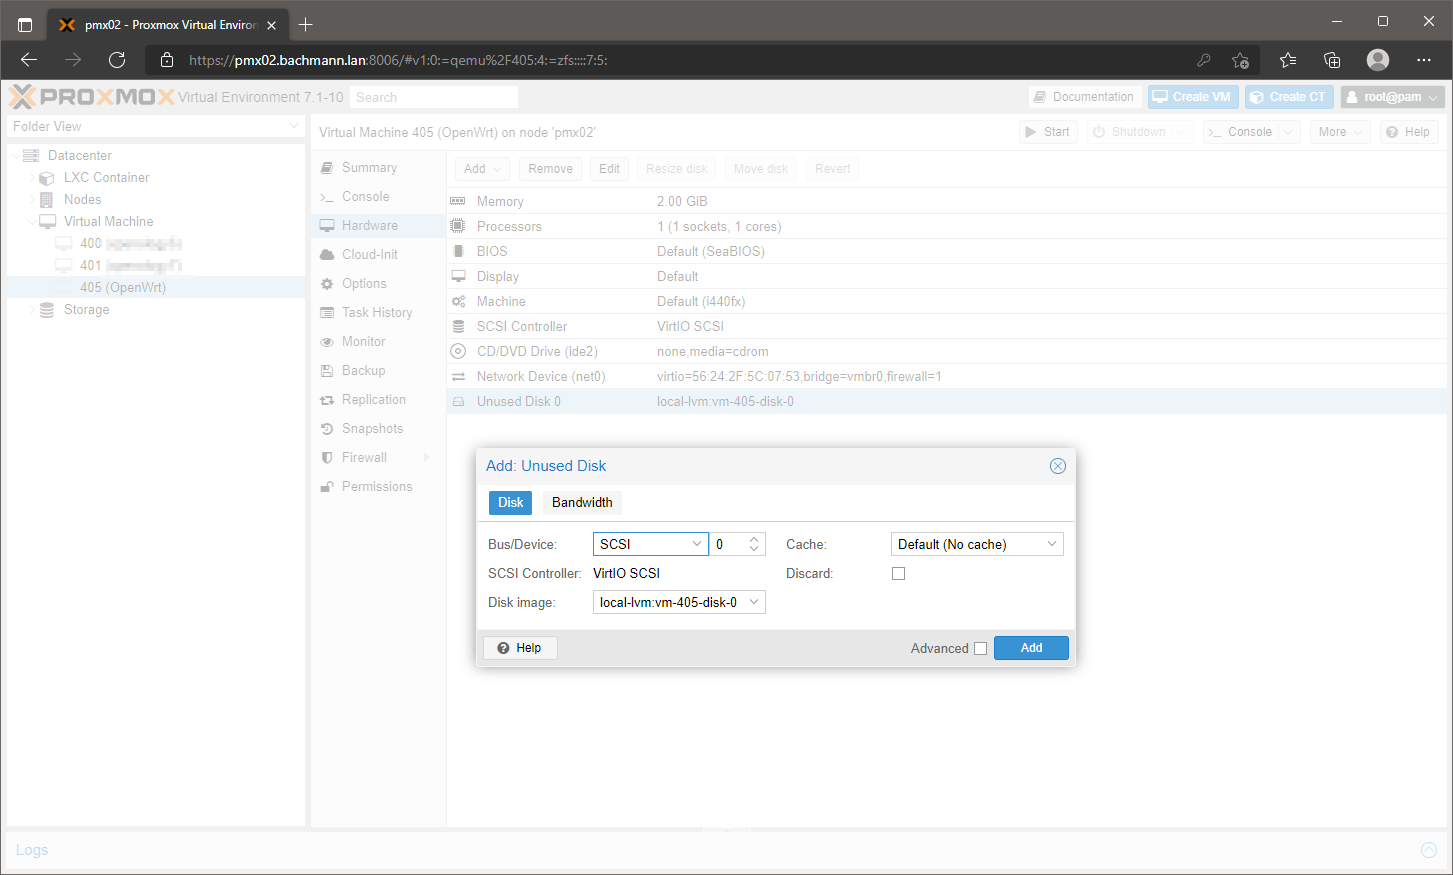
Die neue importierte Unused Disk 0 hinzufügen, die Boot Order auf scsi0 stellen und die VM starten.
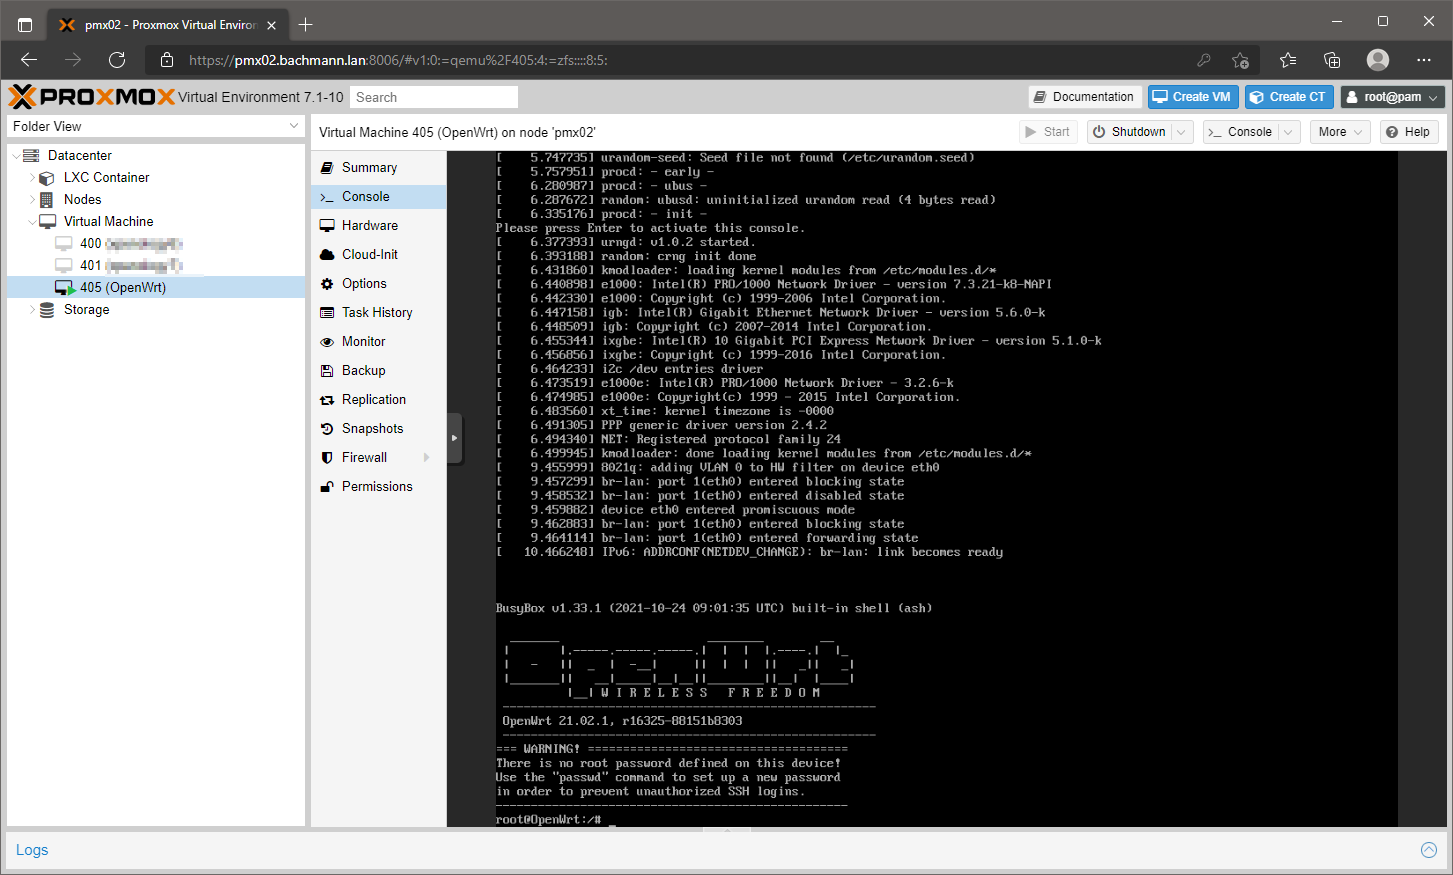
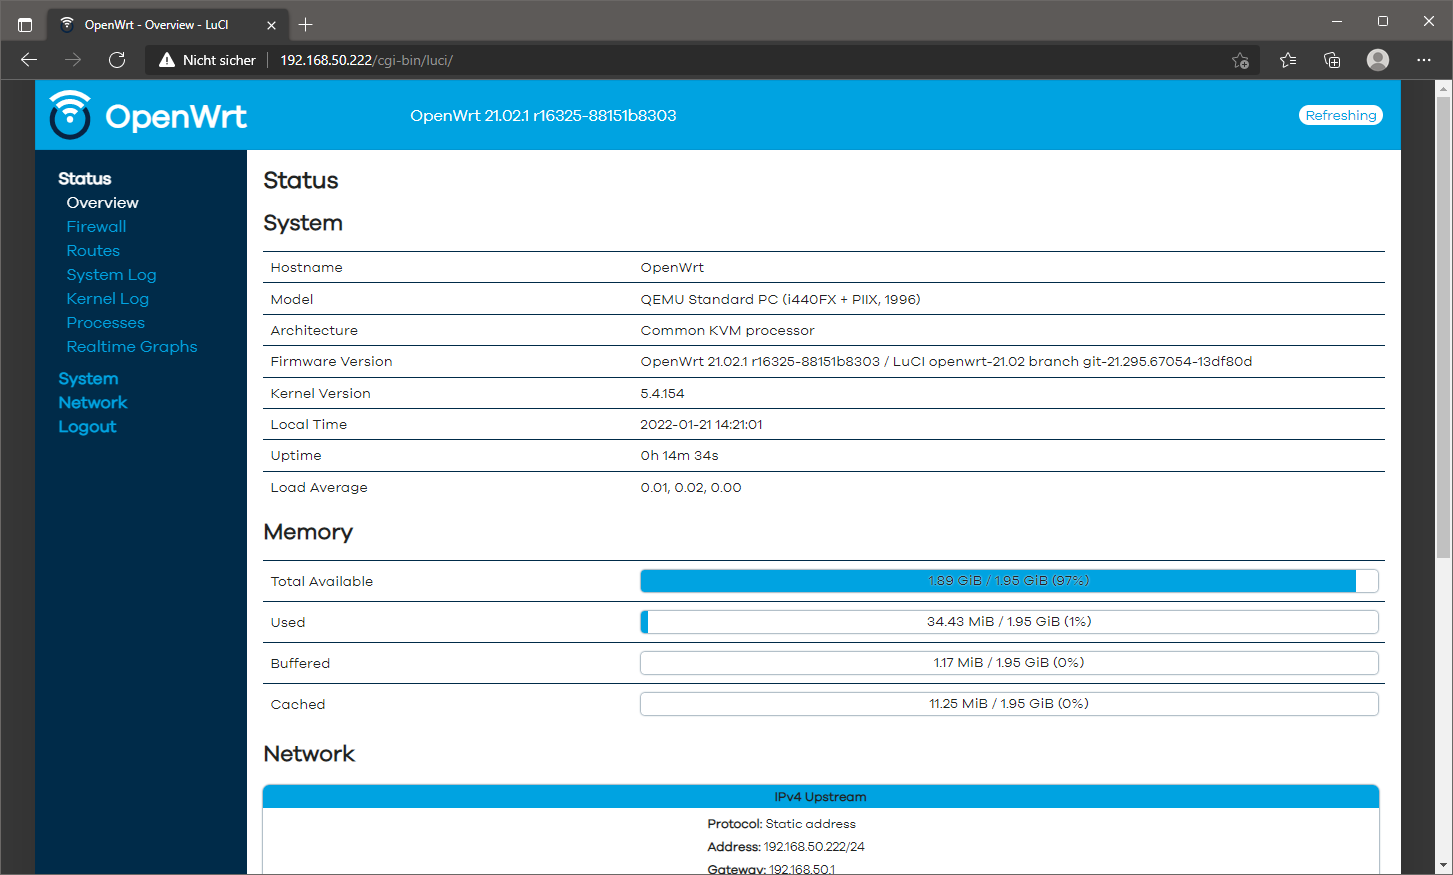
IP Adresse ändern
In der Konsole wird die default IP (192.168.1.1) auf eine aus dem eigenen Netzwerk geändert.
root@OpenWrt:/# vi /etc/config/network

config interface 'lan'
      option ipaddr ´192.168.50.222´
      option gateway ´192.168.50.1´
      option dns ´192.168.50.20´
Netzwerk neu starten.
root@OpenWrt:/# /etc/init.d/network restart
Passwort setzen
Das Webinterface bemängelt sonst das kein Router Passwort gesetzt ist. (erledige ich auf der Konsole in einem mit)
root@Openwrt:/# passwd
Webinterface und Theme
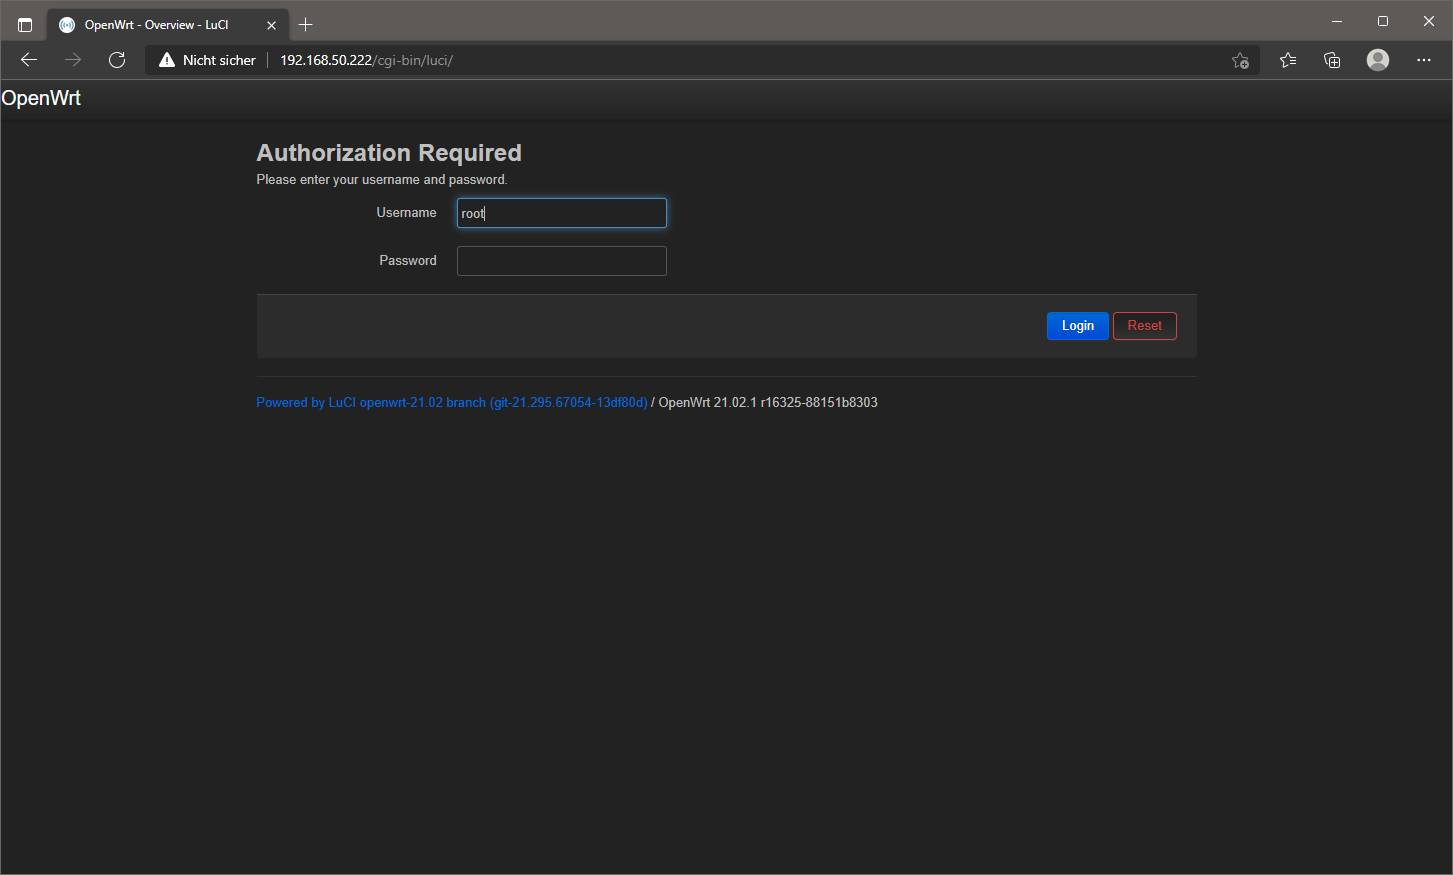
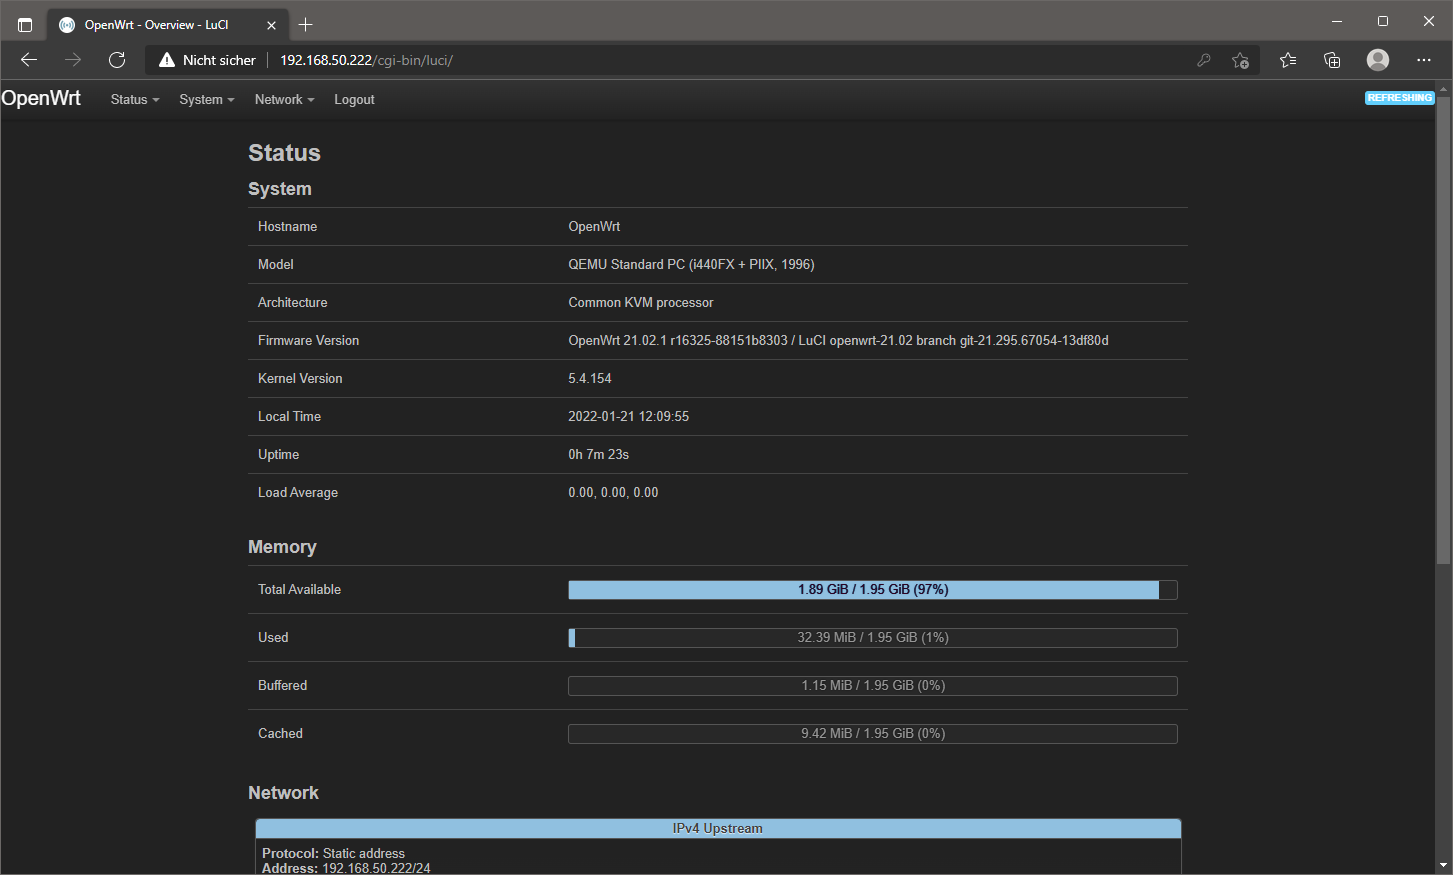
OpenWrt ist jetzt über das Webinterface erreichbar.
Das luci-theme-openwrt-2020 gefällt mir persönlich am besten. Installiere ich über System → Software nach.

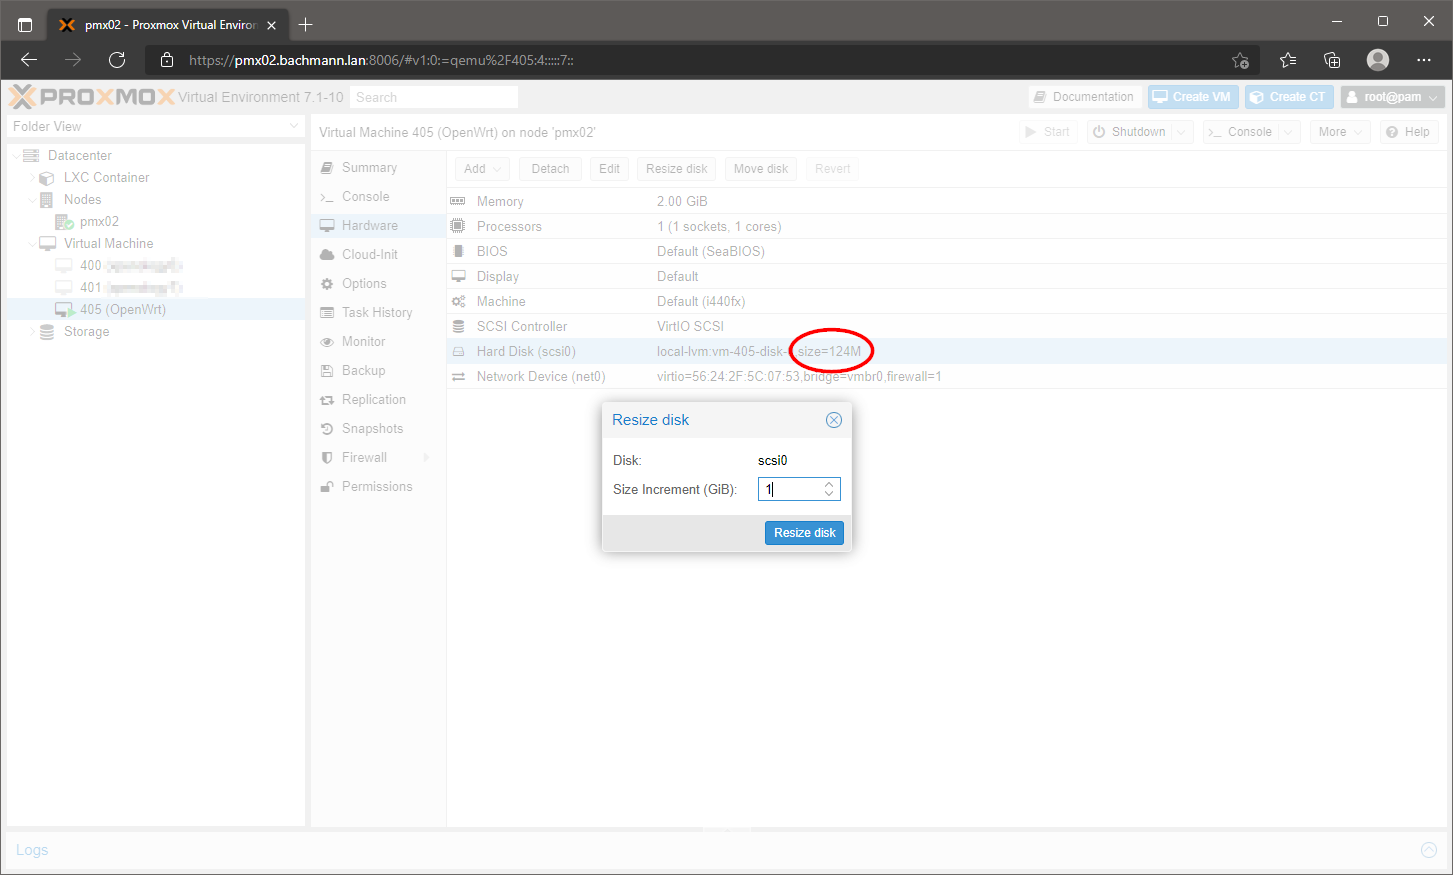
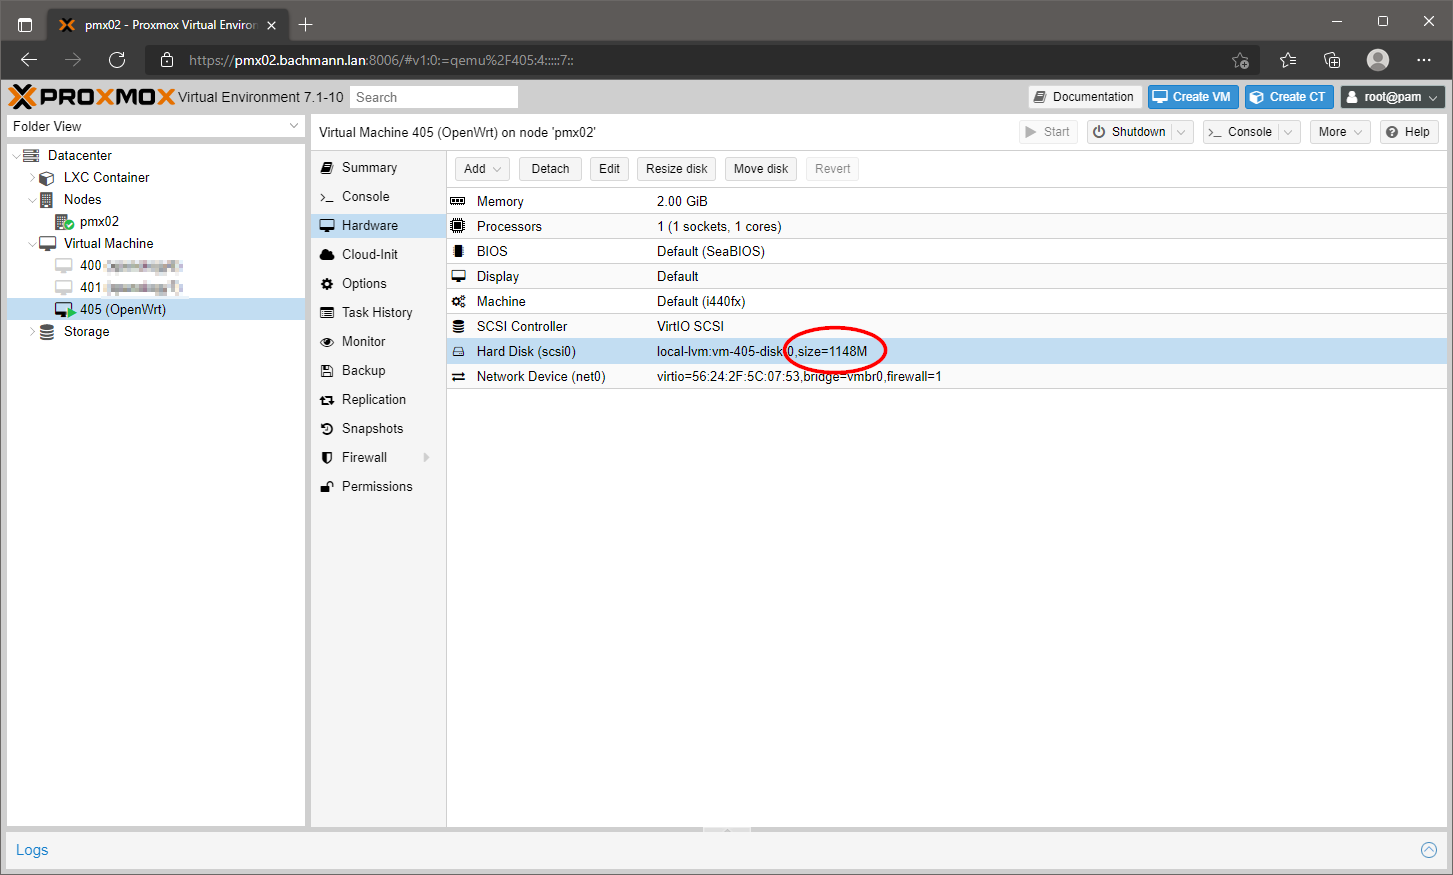
Festplatte vergrößern
Die OpenWrt Disk hat 124 MB. Benötigt man mehr Platz, kann sie erweitert werden. Hier mal um 1 GB.
Die VM wird jetzt von einer Linux Live CD gestartet um mit dem tool parted die Disk zu vergrößern. (ich nutze dazu SystemRescue)
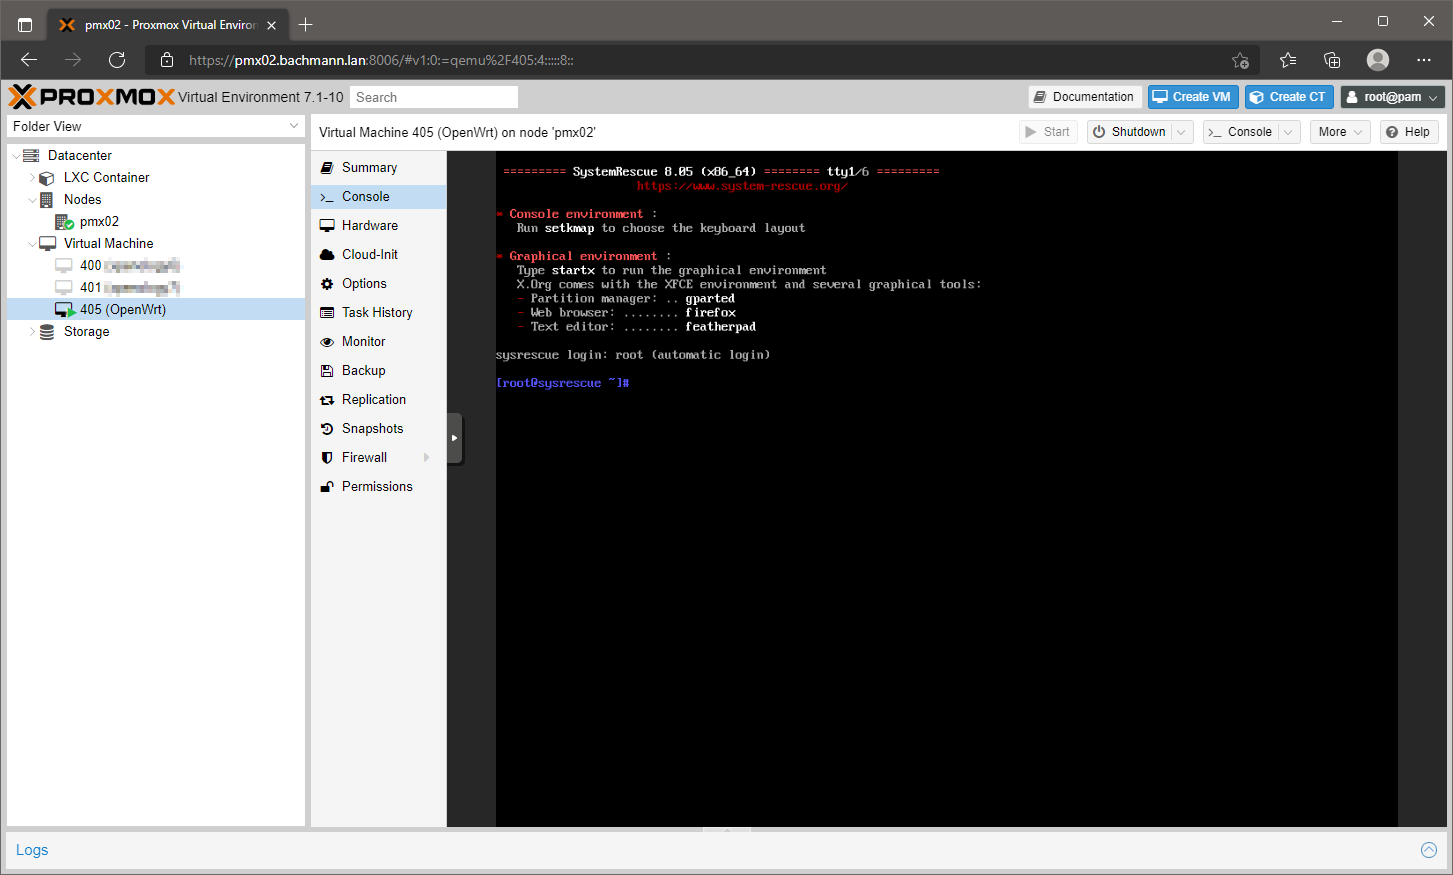
Die Disk hat 2 Partitionen. Eine boot und eine system.
[root@sysresccd ~]# parted /dev/sda print
Model: QEMU QEMU HARDDISK (scsi)
Disk /dev/sda: 1204MB
Sector size (logical/physical): 512B/512B
Partition Table: msdos
Disk Flags:
Number  Start   End     Size    Type     File system  Flags
 1      262kB   17.0MB  16.8MB  primary  ext2         boot
 2      17.3MB  126MB   109MB   primary  ext2
Die Systempartition (2) vergrößern.
[root@sysresccd ~]# parted /dev/sda resizepart 2 1204MB
Information: You may need to update /etc/fstab.
Nochmal prüfen ob der gesamte Speicherplatz der Partition zugewiesen wurde.
[root@sysresccd ~]# parted /dev/sda print
Model: QEMU QEMU HARDDISK (scsi)
Disk /dev/sda: 1204MB
Sector size (logical/physical): 512B/512B
Partition Table: msdos
Disk Flags:
Number  Start   End     Size     Type     File system  Flags
 1      262kB   17.0MB  16.8MB   primary  ext2         boot
 2      17.3MB  1204MB  11863MB  primary  ext2
Zum Schluß noch das Dateisystem auf der Partition erweitern.
[root@sysresccd ~]# resize2fs /dev/sda2
resize2fs 1.46.4 (18-Aug-2021)
Resizing the filesystem on /dev/sda2 to 289664 (4k) blocks.
The filesystem on /dev/sda2 is now 289664 (4k) blocks long.
Erledigt, reboot und wieder OpenWrt starten.


OpenWrt updaten
Für ein sysupgrade wird das aktuellste generic-combined-ext4.img.gz heruntergeladen und über:
System → Backup / Flash Firmware → Flash new firmware image, geflasht. * upgrade package warning *
Nach dem reboot über System → Software, auf neue Updates überprüfen und installieren.
Um nicht jedes Update einzeln zu installieren, kann das auch im Terminal in einem Rutsch erledigt werden.
### alle updates in einem Rutsch installieren
root@OpenWrt:~# opkg list-upgradable | sed -e "s/\s.*//" | while read PKG_NAME; do opkg upgrade "${PKG_NAME}"; done
--- SNIP ---
Upgrading luci-lib-ip on root from git-20.136.49537-fb2f363-1 to git-20.197.49655-210b489-1...
Downloading http://downloads.openwrt.org/releases/19.07.3/packages/i386_pentium4/luci/luci-lib-ip_git-20.197.49655-210b489-1_i386_pentium4.ipk
Configuring luci-lib-ip.
Upgrading luci-mod-system on root from git-20.136.49537-fb2f363-1 to git-20.197.49655-210b489-1...
Downloading http://downloads.openwrt.org/releases/19.07.3/packages/i386_pentium4/luci/luci-mod-system_git-20.197.49655-210b489-1_all.ipk
Configuring luci-mod-system.
Upgrading libuclient20160123 on root from 2019-05-30-3b3e368d-1 to 2020-06-17-51e16ebf-1...
Downloading http://downloads.openwrt.org/releases/19.07.3/packages/i386_pentium4/base/libuclient20160123_2020-06-17-51e16ebf-1_i386_pentium4.ipk
Configuring libuclient20160123.
--- SNIP ---

### nochmal prüfen
root@OpenWrt:~# opkg list-upgradable
luci-app-opkg - git-20.136.49537-fb2f363-1 - git-20.197.49655-210b489-1

### upgraden
root@OpenWrt:~# opkg upgrade luci-app-opkg
Upgrading luci-app-opkg on root from git-20.136.49537-fb2f363-1 to git-20.197.49655-210b489-1...

### nochmal prüfen
root@OpenWrt:~# opkg list-upgradable
Moin,
sehr schöne Anleitung!
Danke sehr!!!
Allerdings sollte man auf
“Nach dem reboot über System → Software, auf neue Updates überprüfen und installieren!” verzichten.
Siehe:
https://forum.openwrt.org/t/opkg-upgrade-package-upgrade-warning/63370
Ui, danke für die Info. Habs oben vermerkt.
Danke fuer die Anleitung. Resize geht natuerlich auch vor dem Import, so man “parted” unter ProxMox installiert:
root@pve:~# wget https://downloads.openwrt.org/releases/19.07.6/targets/x86/generic/openwrt-19.07.6-x86-generic-combined-ext4.img.gz
Length: 8422395 (8.0M) [application/octet-stream]
Saving to: ‘openwrt-19.07.6-x86-generic-combined-ext4.img.gz’
‘openwrt-19.07.6-x86-generic-combined-ext4.img.gz’ saved [8422395/8422395]
root@pve:~# gunzip openwrt-19.07.6-x86-generic-combined-ext4.img.gz
gzip: openwrt-19.07.6-x86-generic-combined-ext4.img already exists; do you wish to overwrite (y or n)? y
root@pve:~# parted openwrt-19.07.6-x86-generic-combined-ext4.img print
Model: (file)
Disk /root/openwrt-19.07.6-x86-generic-combined-ext4.img: 286MB
Sector size (logical/physical): 512B/512B
Partition Table: msdos
Disk Flags:
Number Start End Size Type File system Flags
1 262kB 17.0MB 16.8MB primary ext2 boot
2 17.3MB 286MB 268MB primary ext2
root@pve:~# bc
bc 1.07.1
Copyright 1991-1994, 1997, 1998, 2000, 2004, 2006, 2008, 2012-2017 Free Software Foundation, Inc.
This is free software with ABSOLUTELY NO WARRANTY.
For details type `warranty’.
1024-268
756
quit
root@pve:~# dd if=/dev/zero of=append.img count=756 bs=1M
756+0 records in
756+0 records out
root@pve:~# parted openwrt-19.07.6-x86-generic-combined-ext4.img resizepart 2 1024MB
root@pve:~# parted openwrt-19.07.6-x86-generic-combined-ext4.img print
Model: (file)
Disk /root/openwrt-19.07.6-x86-generic-combined-ext4.img: 1078MB
Sector size (logical/physical): 512B/512B
Partition Table: msdos
Disk Flags:
Number Start End Size Type File system Flags
1 262kB 17.0MB 16.8MB primary ext2 boot
2 17.3MB 1024MB 1007MB primary ext2
root@pve:~# losetup –find –partscan openwrt-19.07.6-x86-generic-combined-ext4.img
root@pve:~# lsblk
NAME MAJ:MIN RM SIZE RO TYPE MOUNTPOINT
loop0 7:0 0 1G 0 loop
|-loop0p1 259:0 0 16M 0 part
`-loop0p2 259:1 0 960.1M 0 part
root@pve:~# resize2fs /dev/loop0p2
resize2fs 1.44.5 (15-Dec-2018)
Resizing the filesystem on /dev/loop0p2 to 245776 (4k) blocks.
The filesystem on /dev/loop0p2 is now 245776 (4k) blocks long.
root@pve:~# losetup –detach /dev/loop0
root@pve:~# rm append.img
root@pve:~#
Danke für den Tipp!
Ich hatte mit dem hier beschriebenen Vorgehen Schwierigkeiten:
root@nas:~# parted openwrt-21.02.1-x86-64-generic-ext4-combined.img resizepart 2 2048MB
Error: The location 2048MB is outside of the device /root/openwrt-21.02.1-x86-64-generic-ext4-combined.img.
Stattdessen hat bei mir folgendes zu gewünschten Ergebnis geführt:
root@nas:~# qemu-img resize openwrt-21.02.1-x86-64-generic-ext4-combined.img 2G
WARNING: Image format was not specified for ‘openwrt-21.02.1-x86-64-generic-ext4-combined.img’ and probing guessed raw.
Automatically detecting the format is dangerous for raw images, write operations on block 0 will be restricted.
Specify the ‘raw’ format explicitly to remove the restrictions.
Image resized.
root@nas:~# parted openwrt-21.02.1-x86-64-generic-ext4-combined.img 2 100%
root@nas:~# parted openwrt-21.02.1-x86-64-generic-ext4-combined.img print
Model: (file)
Disk /root/openwrt-21.02.1-x86-64-generic-ext4-combined.img: 2147MB
Sector size (logical/physical): 512B/512B
Partition Table: msdos
Disk Flags:
Number Start End Size Type File system Flags
1 262kB 17.0MB 16.8MB primary ext2 boot
2 17.3MB 2147MB 2130MB primary ext2
root@nas:~# losetup -Pf openwrt-21.02.1-x86-64-generic-ext4-combined.img
root@nas:~# resize2fs /dev/loop0p2
resize2fs 1.46.2 (28-Feb-2021)
Resizing the filesystem on /dev/loop0p2 to 520064 (4k) blocks.
The filesystem on /dev/loop0p2 is now 520064 (4k) blocks long.
root@nas:~# losetup -d /dev/loop0
Dann wie im originalen Beitrag beschrieben in die VM einbinden und booten.
root@OpenWrt:/# df -h /
Filesystem Size Used Available Use% Mounted on
/dev/root 2.0G 15.8M 1.9G 1% /
Wofür wird append.img angelegt? Die Datei wird angelegt und gelöscht, aber nicht verwendet.
Gruß, Bastian
Bei mir hat nur die 64-bit variante funktioniert:
https://downloads.openwrt.org/releases/19.07.7/targets/x86/64/openwrt-19.07.7-x86-64-combined-ext4.img.gz
Wollte sonst nicht booten.
Danke für die Info.
Vielen Dank für dieses gelungene Tutorial, hat super funktioniert mit OpenWrt 21.02.1
Verwende die x64 Variante
Nach dem löschen der Hard-disk musste ich unter ‘Options’ bei der Boot-Order scsi0 wieder mit reinnehmen.
Disk Resize hat auch perfekt geklappt
Danke für die Info.
Vielen Dank für die Super Anleitung!