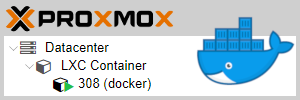
Mit Proxmox lässt sich Docker auch in einem LXC Container betreiben und funktioniert ohne weitere Einstellungen.
Für den Container nutze ich ein Alpine Linux. Das Grundsystem mit Docker belegt gerade mal ~270 MB und benötigt wenig Ressourcen.
08.09.2022 - Anleitung aktualisiert (Debian 11 als OS im Container)
19.09.2021 - Anleitung aktualisiert (Alpine Linux als OS im Container)
10.10.2020 - Anleitung aktualisiert
mein Setup:
- Proxmox 7.0-11
- alpine-3.14-default LXC Template
Docker im Container installieren.
Der neu erstellte Container wird standardmäßig unprivileged und mit nesting installiert, passt.

Alpine Linux
System updaten.
docker:~# apk update
docker:~# apk upgrade
Docker installieren.
docker:~# apk add docker
Versionen prüfen.
docker:~# docker -v
Docker version 20.10.16, build aa7e414fdcb23a66e8fabbef0a560ef1769eace5
Docker automatisch starten lassen und rebooten.
docker:~# rc-update add docker
docker:~# reboot
Man könnte jetzt für jede einzelne Anwendung einen eigenen Docker Container aufsetzten. Ob das Sinn macht oder nicht, sei mal dahingestellt.
Fehlermeldung: unable to apply RC_ULIMIT settings
Docker läuft, beim manuellen Starten und Stoppen von Docker gibt es allerdings eine Fehlermeldung. (Kann man auch ignorieren!?)
docker:~# service docker start
sh: error setting limit: Operation not permitted
 * docker: unable to apply RC_ULIMIT settings
 * Starting Docker Daemon ... [ ok ]
Wenn ich den rc_ulimit Eintrag in der /etc/init.d/docker ausdokumentiere,
#rc_ulimit="${DOCKER_ULIMIT:--c unlimited -n 1048576 -u unlimited}"
ist die Fehlermeldung weg.
docker:~# service docker start
 * Starting Docker Daemon ... [ ok ]
Keine Ahnung was es damit auf sich hat. ;)
Debian 11 Bullseye
Benötigte Pakete installieren.
docker:~# apt install ca-certificates curl gnupg lsb-release
Docker GPG Schlüssel laden und Repository anlegen.
docker:~# curl -fsSL https://download.docker.com/linux/debian/gpg | gpg --dearmor -o /usr/share/keyrings/docker-archive-keyring.gpg
docker:~# echo "deb [arch=$(dpkg --print-architecture) signed-by=/usr/share/keyrings/docker-archive-keyring.gpg] https://download.docker.com/linux/debian $(lsb_release -cs) stable" | tee /etc/apt/sources.list.d/docker.list > /dev/null
Docker installieren
docker:~# apt update
docker:~# apt install docker-ce docker-ce-cli containerd.io
Versionen prüfen.
docker:~# docker -v
Docker version 20.10.17, build 100c701
Vielen Dank für die tolle Beschreibung.
Seit dem Update von Proxmox 5 auf Proxmox 6 funktionieren meine in einem LXC Container installiertes Docker nicht mehr.
Siehe: https://forum.proxmox.com/threads/lxc-unprivilegierte-container-backup-clone-geht-nicht-mehr.66350/#post-298054
Funktioniert bei Ihnen Docker weiterhin in einem unprivilegierten LXC Container?
Vielen Dank!
Tony
Hallo Tony,
Docker läuft weiterhin unter Proxmox 6 in einem LXC Container!
Hast du keyctl und nesting aktiviert?
Hallo,
ich konnte LXC Container mit Docker nach deiner Anleitung erfolgreich erstellen. Aber als ich versucht habe über den restore Befehl die Diskgröße zu verkleinern schlägt das immer fehl “mknod Operation not permitted” scheint mit “/docker/overlay2 ” zusammenzuhängen.
Jetzt denke ich mir, dass die Backups der LXC Container mit Docker nicht wirklich brauchbar sind, da ein restore ja nicht klappt.
Hast du das Problem auch, oder konntest du das lösen?
Ich verwende Proxmox 6.1.8
Hallo,
ein backup und restore eines Containers (egal welcher Art, auch mit Docker) funktioniert problemlos!!
Das sollte über die GUI bei dir ja auch funktionieren, oder?
Wie ist denn dein restore Befehl um die Platte zu verkleinern?
Mein Vorgehen ist folgendes:
pct stop 106
vzdump 106 -storage local -compress lzo
pct restore 108 /var/lib/vz/dump/vzdump-lxc-106-xxx.tar.lzo -rootfs 8 -storage local-lvm -unprivileged
Der Befehl schlägt auch fehl, wenn ich die Größe der Platte nicht verändere.
Bei Containern die kein Docker enthalten funktioniert das Problemlos.
Lass ich das Flag “unprivileged” weg wird der Befehl ausgeführt, aber den Container läuft dann nicht wirklich wegen falschen Rechten (vermute ich mal, aber ich wollte ja wieder einen unprivileged Container haben).
Hast du ansonsten einen Tipp wie ich die Containergröße verkleinern kann?
Hab das eben zweimal ausprobiert. Proxmox 6.1-8, 10GB LXC Container mit Docker inkl. 2 Containern.
– backup des LXC Containers im Webinterface erstellt
– dann auf die Konsole:
$ pct destroy 360$ pct restore 360 /mnt/pve/backup/dump/vzdump-lxc-360-xyz.tar.lzo -rootfs 6 -unprivileged -storage local-lvm
Total bytes read: 1812234240 (1.7GiB, 226MiB/s)
Detected container architecture: amd64
root@pmx01:~# pct restore 360 /mnt/pve/backup/dump/vzdump-lxc-360-xyz.tar.lzo -rootfs 6 -unprivileged -storage local-lvm
Logical volume "vm-360-disk-0" created.
mke2fs 1.44.5 (15-Dec-2018)
Discarding device blocks: done
Creating filesystem with 1572864 4k blocks and 393216 inodes
Filesystem UUID: aaad622d-c619-427a-c79c-321f4bdab1d8
Superblock backups stored on blocks:
32768, 98304, 163840, 229376, 294912, 819200, 884736
Allocating group tables: doneWriting inode tables: done
Creating journal (16384 blocks): done
Multiple mount protection is enabled with update interval 5 seconds.
Writing superblocks and filesystem accounting information: done
extracting archive '/mnt/pve/backup/dump/vzdump-lxc-360-2020_03_26-xyz.tar.lzo'Total bytes read: 1812234240 (1.7GiB, 225MiB/s)
Detected container architecture: amd64
Hat problemlos funktioniert. Shrinkt von 10GB auf 6GB und läuft.
Ohne Neuinstallation des Containers wüsste ich jetzt keine andere Möglichkeit den Container kleiner zu bekommen.
Hallo,
komisch, eben nochmal probiert und ich erhalte immer noch den Fehler, hier mal die komplette Ausgabe:
root@pve:~# pct restore 107 /var/lib/vz/dump/vzdump-lxc-106-2020_03_30-08_50_32.tar.lzo -rootfs 8 -unprivileged -storage local-lvm
Logical volume “vm-107-disk-0” created.
mke2fs 1.44.5 (15-Dec-2018)
Discarding device blocks: done
Creating filesystem with 2097152 4k blocks and 524288 inodes
Filesystem UUID: 0b2c8abe-1a72-4651-b465-f223b04f89ee
Superblock backups stored on blocks:
32768, 98304, 163840, 229376, 294912, 819200, 884736, 1605632
Allocating group tables: done

Writing inode tables: done

Creating journal (16384 blocks): done

Multiple mount protection is enabled with update interval 5 seconds.

Writing superblocks and filesystem accounting information: done
extracting archive ‘/var/lib/vz/dump/vzdump-lxc-106-2020_03_30-08_50_32.tar.lzo’
tar: ./var/lib/docker/overlay2/cc0f9d85a741394bd12a64210e3852ad7a44ea29622686f9f24d01c19802a1ce/diff/tmp/patches: Cannot mknod: Operation not permitted
Total bytes read: 4856279040 (4.6GiB, 148MiB/s)
tar: Exiting with failure status due to previous errors
Logical volume “vm-107-disk-0″ successfully removed
unable to restore CT 107 – command ‘lxc-usernsexec -m u:0:100000:65536 -m g:0:100000:65536 — tar xpf – –lzop –totals –one-file-system -p –sparse –numeric-owner –acls –xattrs ‘–xattrs-include=user.*’ ‘–xattrs-include=security.capability’ ‘–warning=no-file-ignored’ ‘–warning=no-xattr-write’ -C /var/lib/lxc/107/rootfs –skip-old-files –anchored –exclude ‘./dev/*” failed: exit code 2
Naja vielleicht finde ich noch eine Lösung.
Danke für den Test auf deinem System.
prox 6.3-4 mit Deb 10
Egal ob (un-)privilegiert, nested oder nicht – das Problem mit /proc scheint immer das Selbe… :(
:~# docker run hello-world
Unable to find image ‘hello-world:latest’ locally
latest: Pulling from library/hello-world
b8dfde127a29: Pull complete
Digest: sha256:308866a43596e83578c7dfa15e27a73011bdd402185a84c5cd7f32a88b501a24
Status: Downloaded newer image for hello-world:latest
docker: Error response from daemon: OCI runtime create failed: container_linux.go:344: starting container process caused “process_linux.go:424: container init caused \”rootfs_linux.go:58: mounting \\\”proc\\\” to rootfs \\\”/var/lib/docker/vfs/dir/1e15c9cd2982bfd19aac54c71db2996c410e7c76477f92f0ed8e2fce60c4b45e\\\” at \\\”/proc\\\” caused \\\”permission denied\\\”\””: unknown.
ERRO[0004] error waiting for container: context canceled
Bei mir funktionert das immer noch.
– Proxmox 6.3-6 / privileged / nested / Debian 10 LXC
$ docker -v

Docker version 18.09.1, build 4c52b90
$ docker-compose -v
docker-compose version 1.21.0, build unknown
$ docker run hello-world
Unable to find image 'hello-world:latest' locally
latest: Pulling from library/hello-world
b8dfde127a29: Pull complete
Digest: sha256:308866a43596e83578c7dfa15e27a73011bdd402185a84c5cd7f32a88b501a24
Status: Downloaded newer image for hello-world:latest
Hello from Docker!
This message shows that your installation appears to be working correctly.
To generate this message, Docker took the following steps:
1. The Docker client contacted the Docker daemon.
2. The Docker daemon pulled the "hello-world" image from the Docker Hub.
(amd64)
3. The Docker daemon created a new container from that image which runs the
executable that produces the output you are currently reading.
4. The Docker daemon streamed that output to the Docker client, which sent it
to your terminal.
To try something more ambitious, you can run an Ubuntu container with:
$ docker run -it ubuntu bash
Zur Meldung
sh: error setting limit: Operation not permitted
* docker: unable to apply RC_ULIMIT settings
Vielleicht noch mal das nesting setzen?
lxc config set security.nesting true
Wenn das nicht reicht, kann man auf dem Host folgendes probieren (zum Beispiel 64000):
Ergänze die /etc/security/limits.conf um folgenden Eintrag: * – nofile 64000
Dann noch zusätzlich /etc/sysctl.conf : fs.file-max = 64000
Danach sysctl neu laden: sudo sysctl -p /etc/sysctl.conf
Danke für die Tipps, klappt aber irgendwie alles nicht.